


This article explains how to connect a Durofix RV2054-A18 to ELAM via a Smart Work Assistant (SWA) 5 Client Wi-Fi. The tool communicates with the SWA through an OpenProtocol interface over Wi-Fi. The sections below describe how to set up the Wi-Fi connection between the SWA and the tool.
The DurofixOP software is required in order to change settings on the Durofix tool.
Technical requirements:
Integration steps:
The article also includes troubleshooting notes and explains what the Wi-Fi antenna symbols on the tool's display mean. For a successful integration, follow the instructions carefully and make sure that all technical requirements are met.
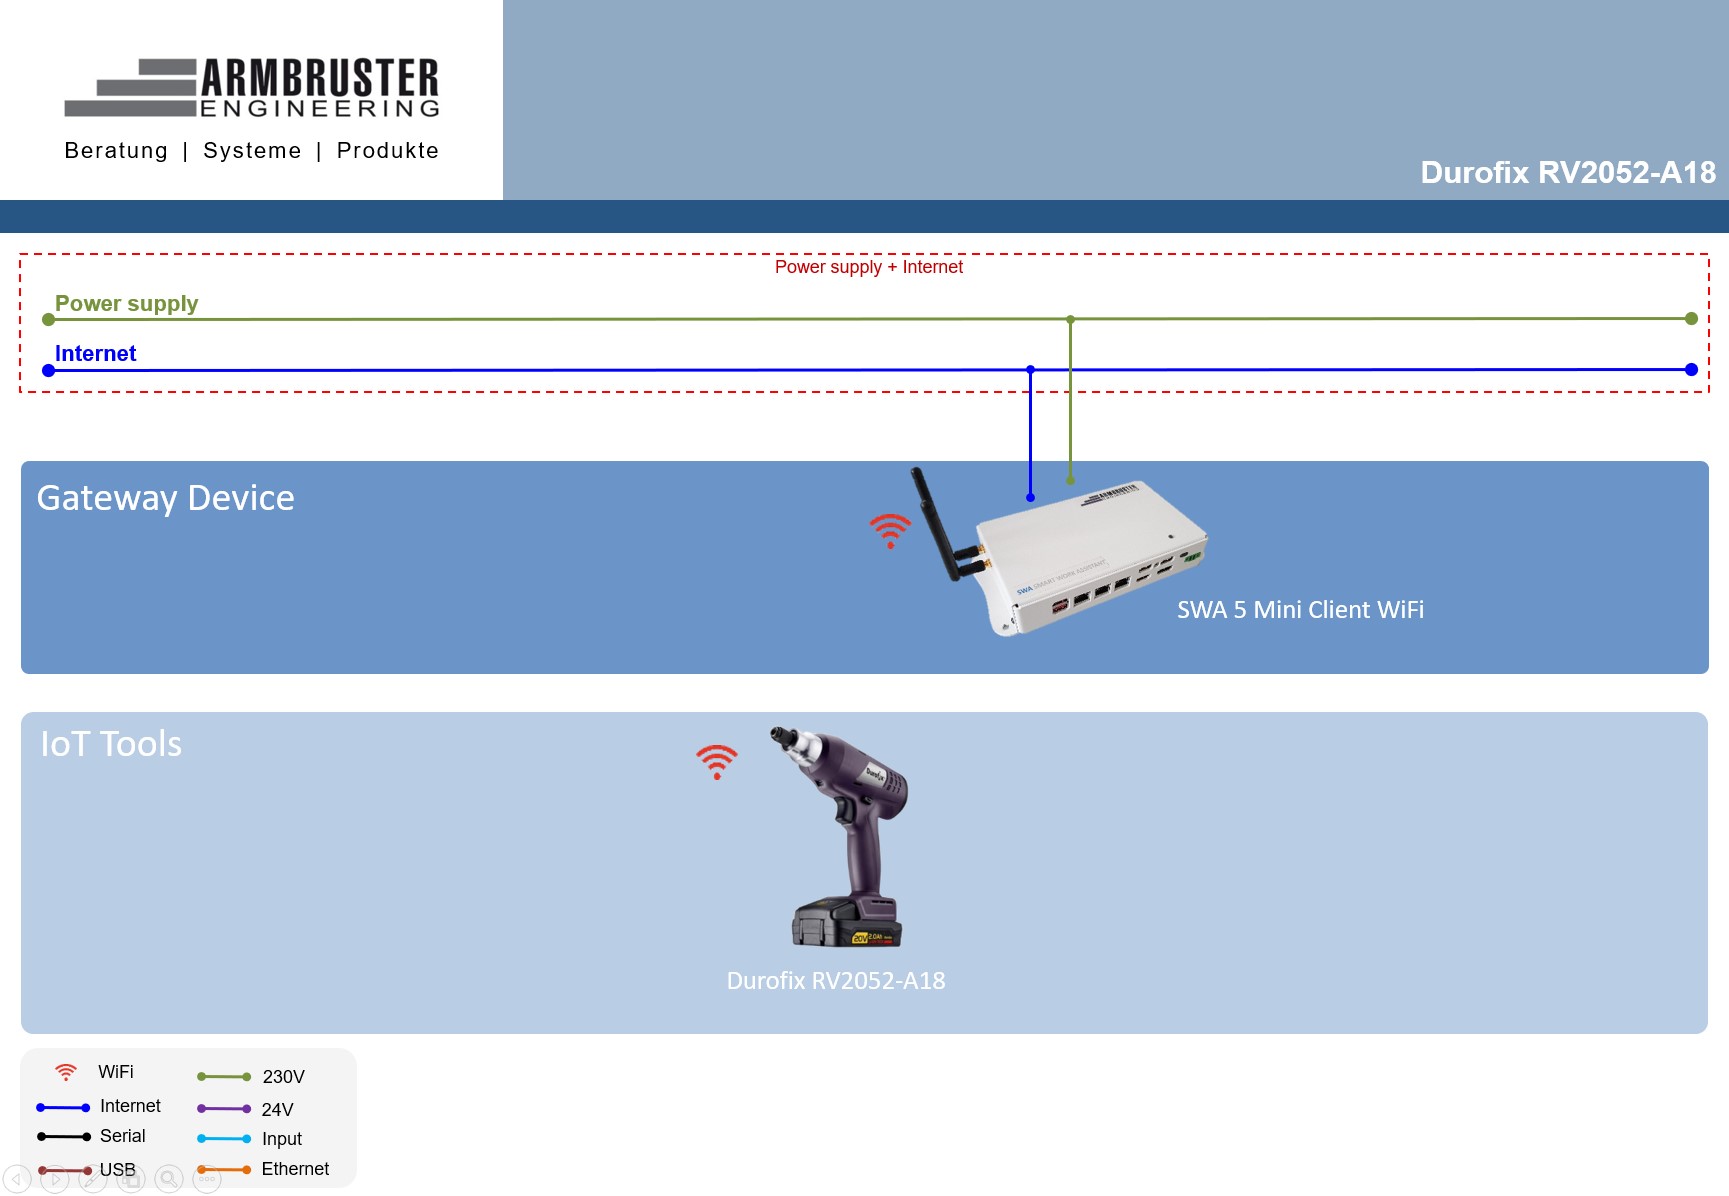
Before the Durofix RV2054-A18 tool can connect to your SWA5 Client Wi-Fi, you have to configure the network settings of the tool. This requires the DurofixOP application, which is used to parameterise and configure the tool, as well as a CP210x driver for the tool's board.
Download DurofixOP:
NOTE: There is currently no download link for the DurofixOP application. Please request the software from your responsible Bossard partner.
Download CP210x driver:
NOTE: The DurofixOP application can only be used on a Windows operating system.
NOTE: Only software version 1.1.0.1 or higher is supported.
ELAM supports the Durofix tool in the following tested configuration:
These values were read out with the DurofixOP software in version 1.3.1.
NOTE: If the Tool Model or Tool Version of your device differs from the values given above, operation and connection setup may differ. The instructions in this article refer to the configuration named above.
Start the DurofixOP software. Enter the password "admin" at the login prompt.

The language settings can be changed under "Setting". In some cases the default language is Chinese.
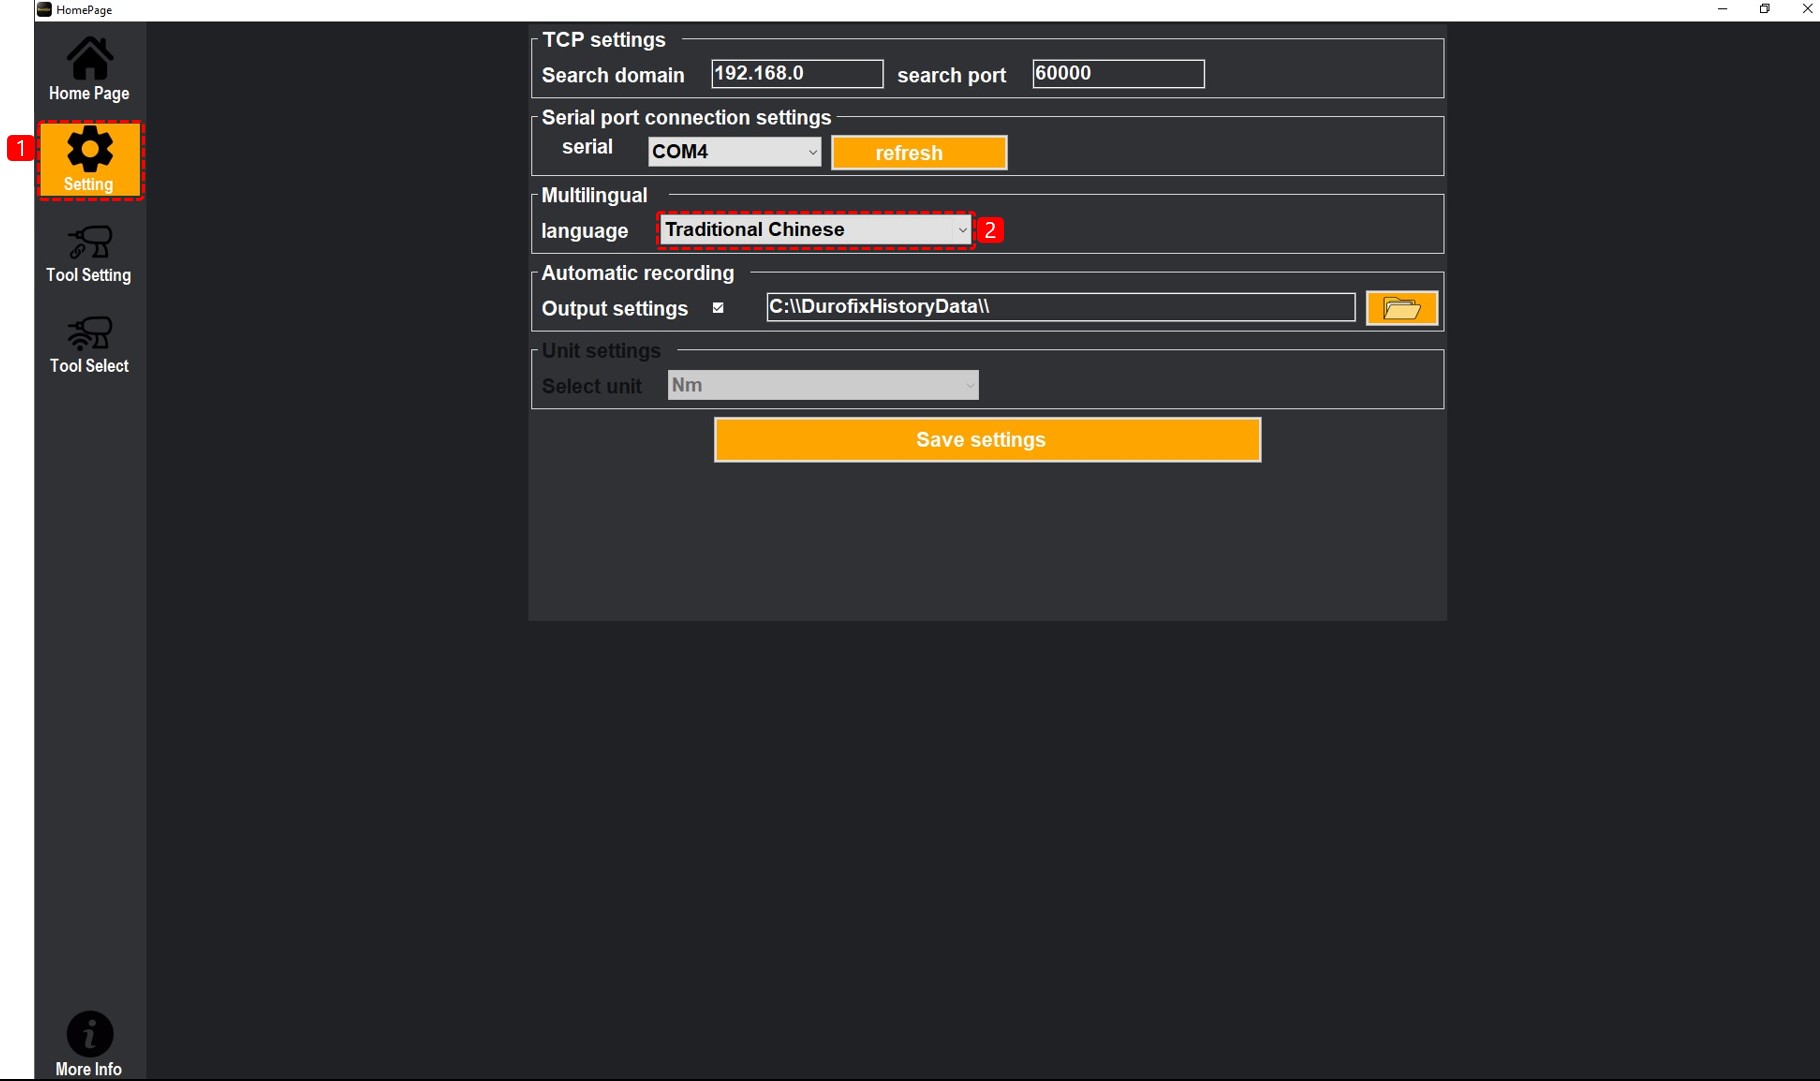
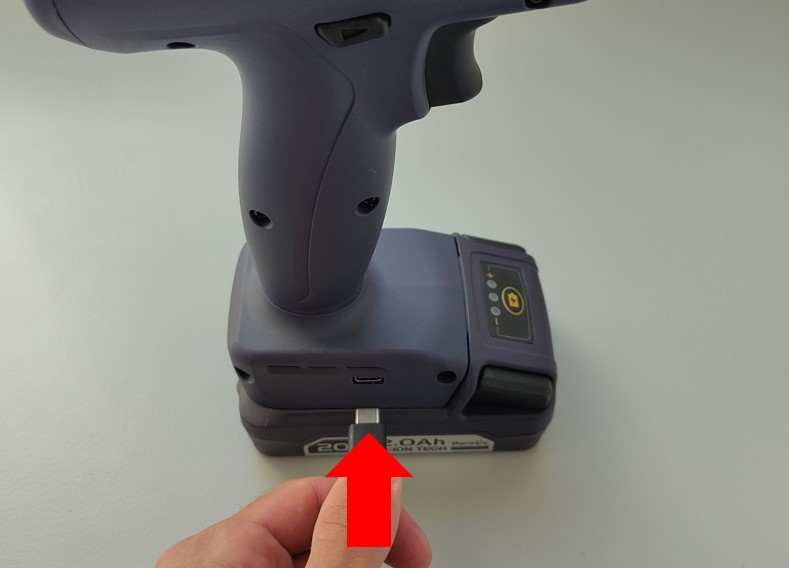
The following section describes how to configure the IP address so that the tool can connect to ELAM and is created automatically as a tool. To do so, the tool must be within the address range 10.42.0.2 to 10.42.0.7. The Durofix tool is connected to the computer via the USB-C port on the side. The battery must be inserted and the tool must be activated (using the trigger).
Note: Please make sure that you have installed the CP210x driver
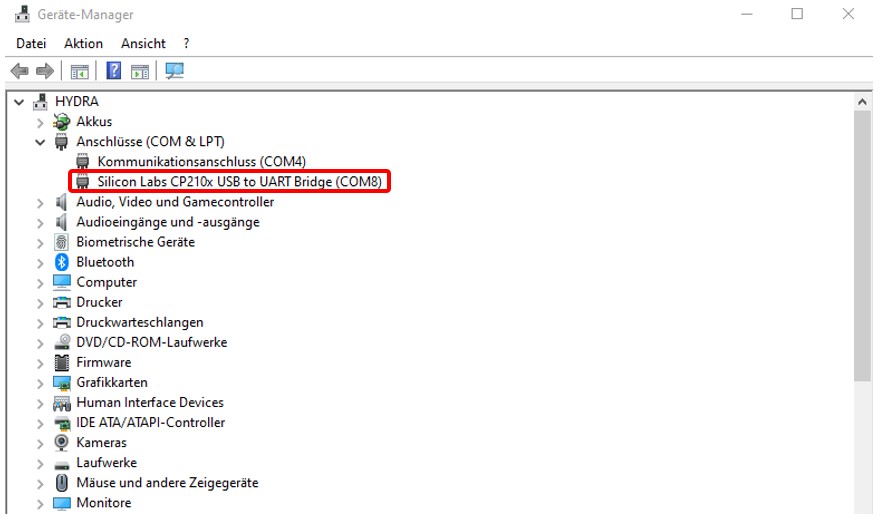
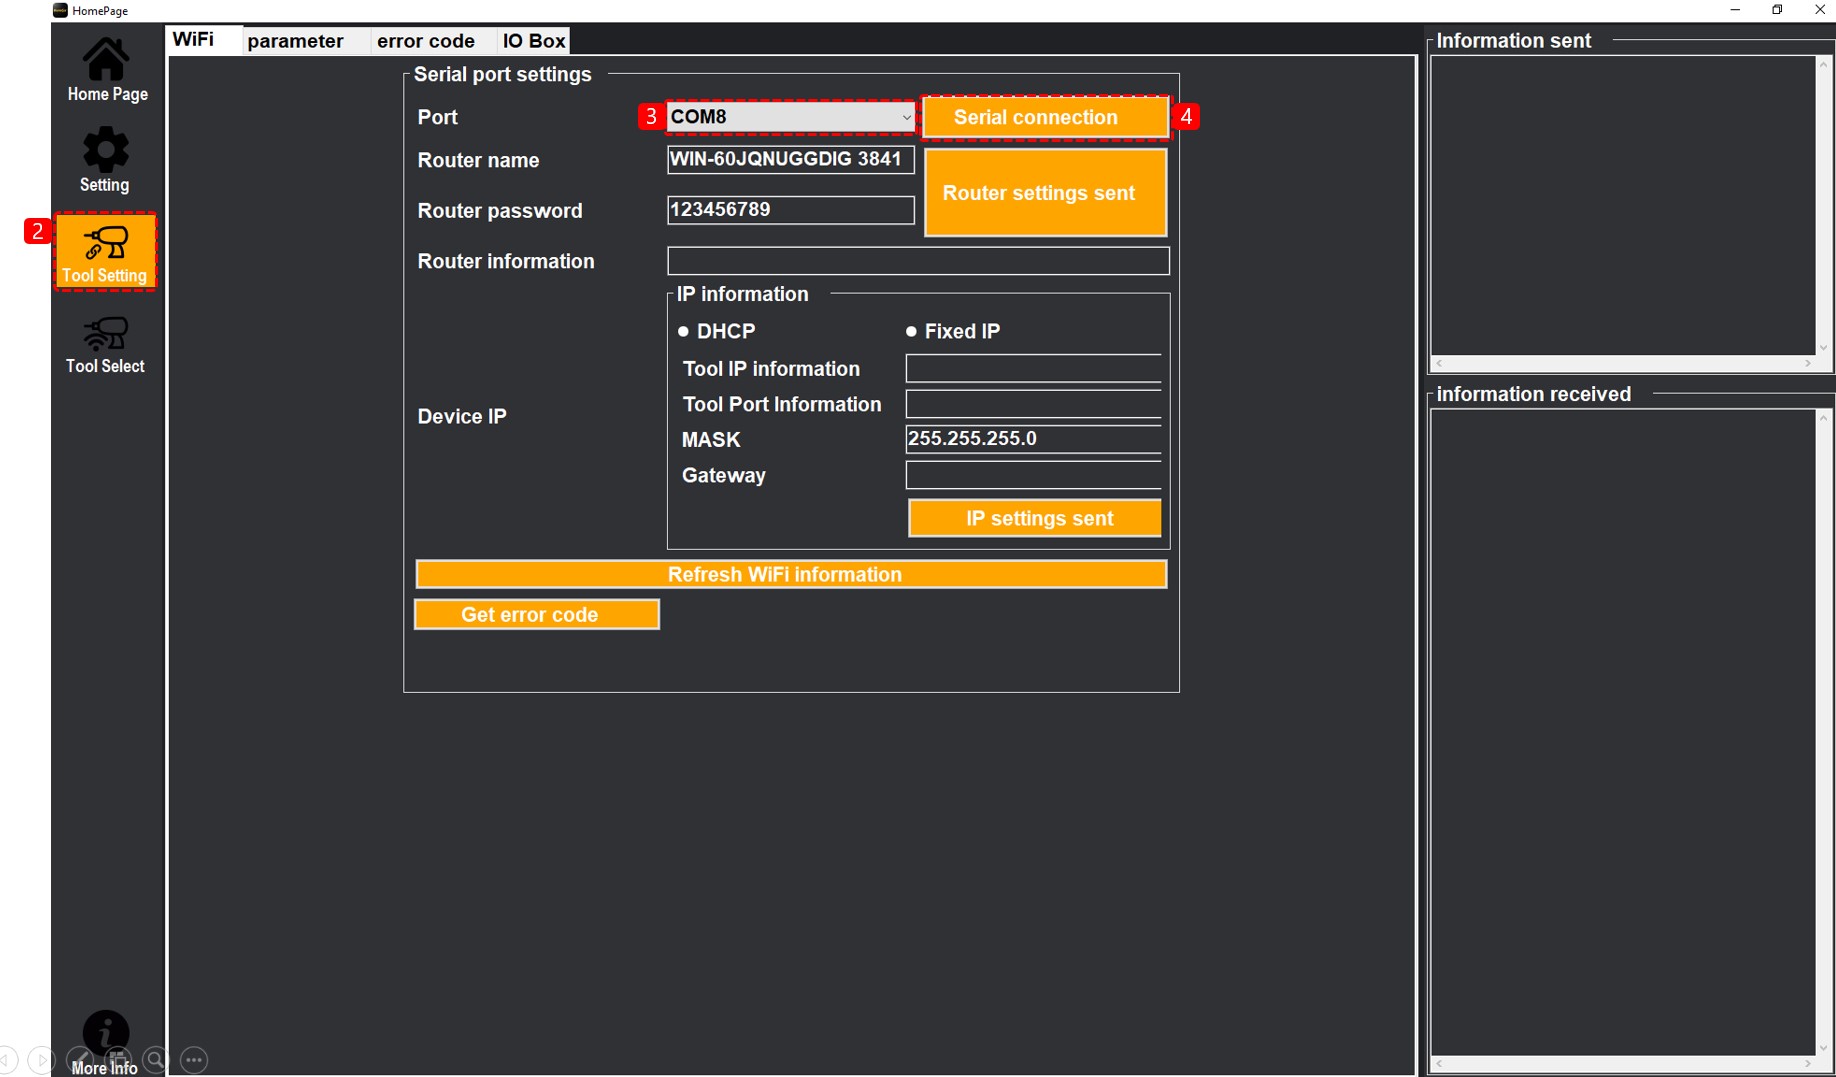
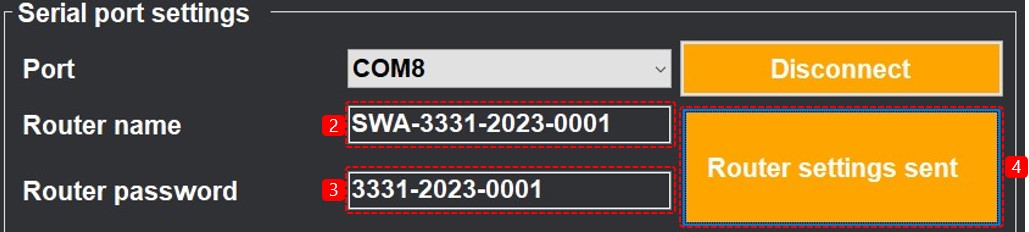
The IP settings can now be configured under "Device IP".
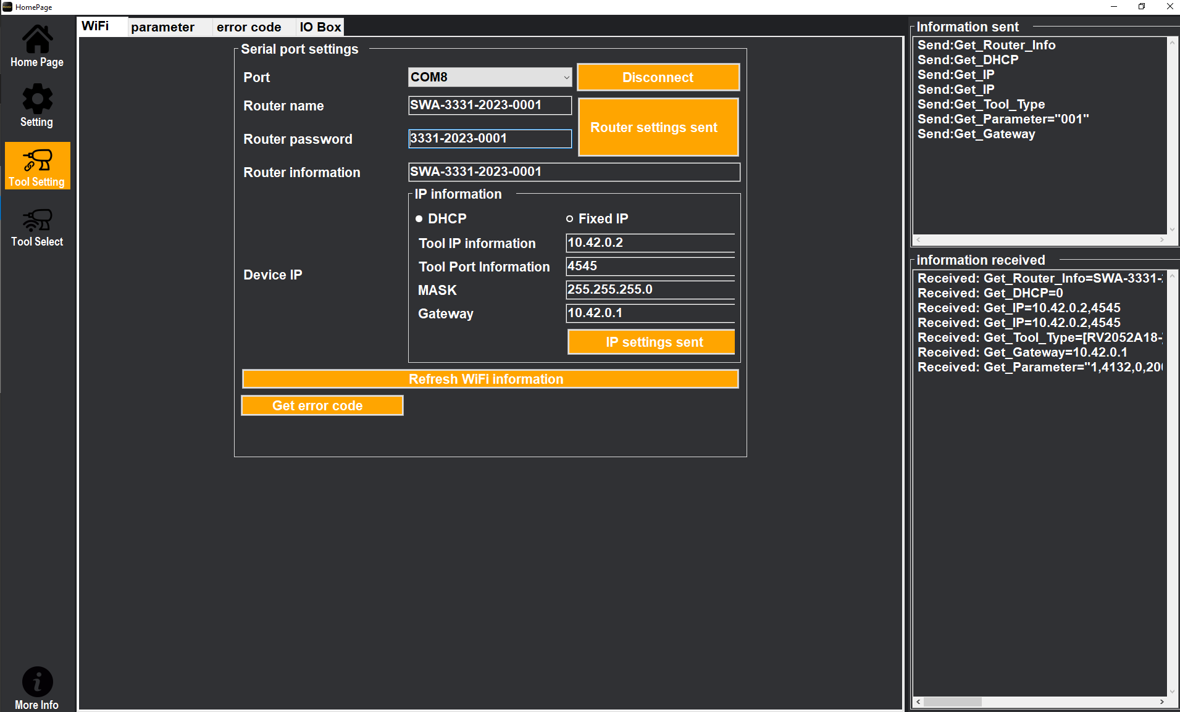
If the connection settings are correct, the tool is shown in ELAM under "Tools".

